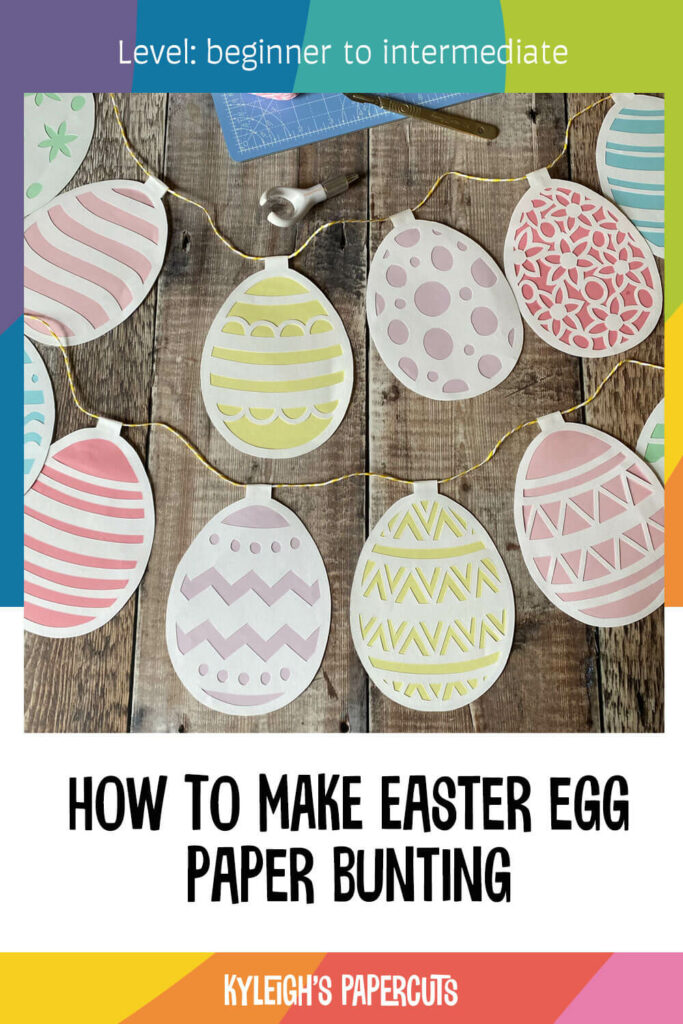
How to make Easter Egg Bunting
Howdy Easter chicks! Here’s a step by step guide on how to make my Eater Egg Bunting. So for the price of a coffee you’ll spend a lovely crafternoon making something stunning that will help you decorate your house for Easter for years to come.
Easter Egg Bunting – what you need
- Scalpel
- A4 Cutting Mat
- Access to a printer
- A4 white paper (7 sheets)
- A4 assorted pastel coloured paper (6 sheets)
- Glue stick or spray glue
- Twine, string or ribbon to hang (I used this paper twine for extra eco friendly brownie points!)
SCALPEL – I like to use a Swann-Moreton 3 handle and a 10a blade, but do find one that YOU love to use because they are such a personal thing (like a favourite pen). I also use a Fiskars Fingertip Swivel Knife for the curves, but as I’ve said before – these are like MARMITE. You either love em or hate em!
Buy: Fiskars Fingertip Swivel Knife | Swann-Moreton 3 Handle & 10a blades
CUTTING MAT – this needs to be a ‘self healing’ cutting mat meaning you can cut your paper on it and it will magically ‘heal’. A good one will bear the brunt of your cutting and maintain a lovely surface. A cheap one will soon break apart leaving indents in the surface.
Buy: A4 cutting mat by Humbrol
Step one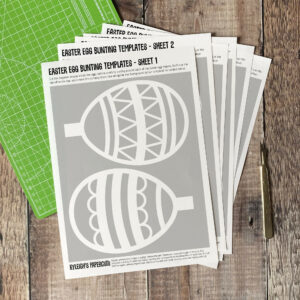
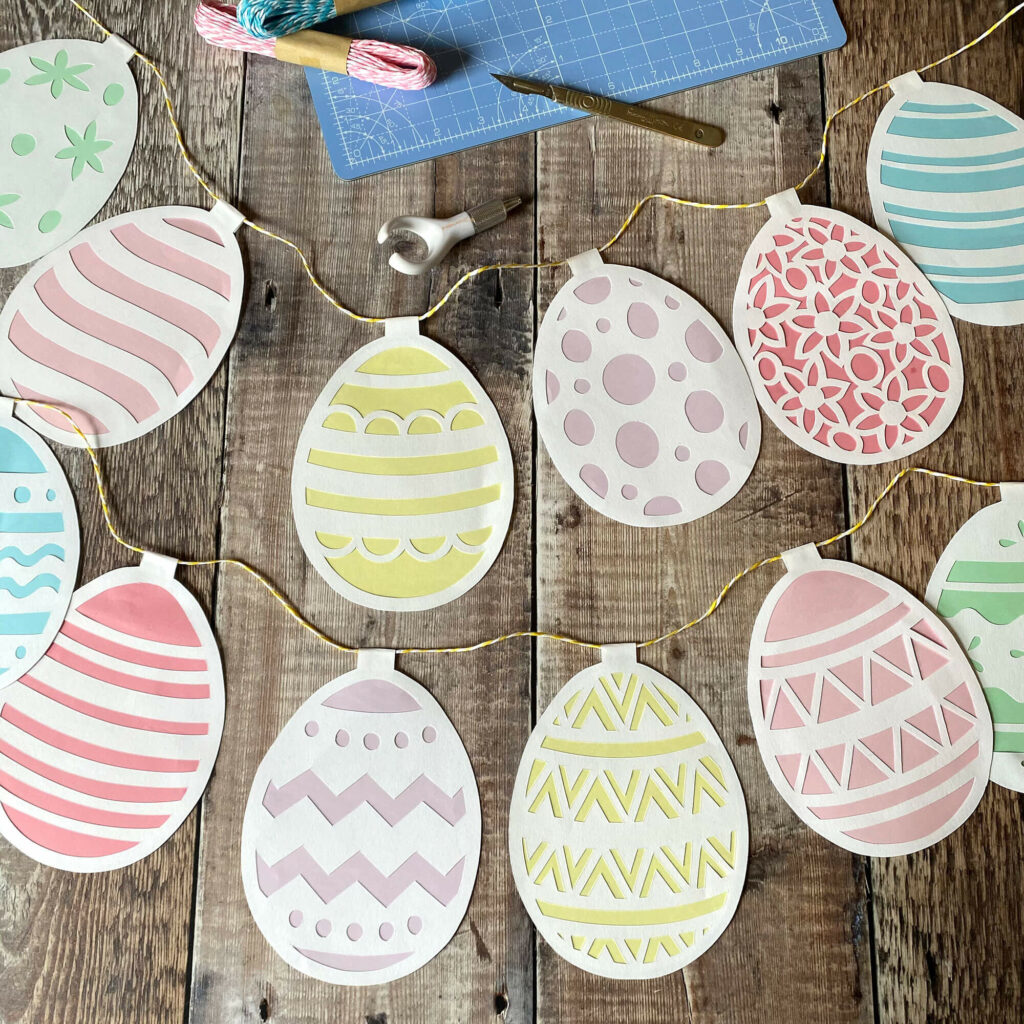
Buy and download my Easter egg bunting here and print out all sheets. There are 6 sheets each with 2 egg designs on each page giving you a total of 12 individually designed Easter Eggs.
Most people have home printers, especially after this past year home schooling and printing endless PDFs! But if you don’t then maybe sweet talk a neighbour or friend into printing it out for you.
I recommend using 120gsm white paper, I have written an extensive blogpost on different paper weights which you can read here.
 Step two
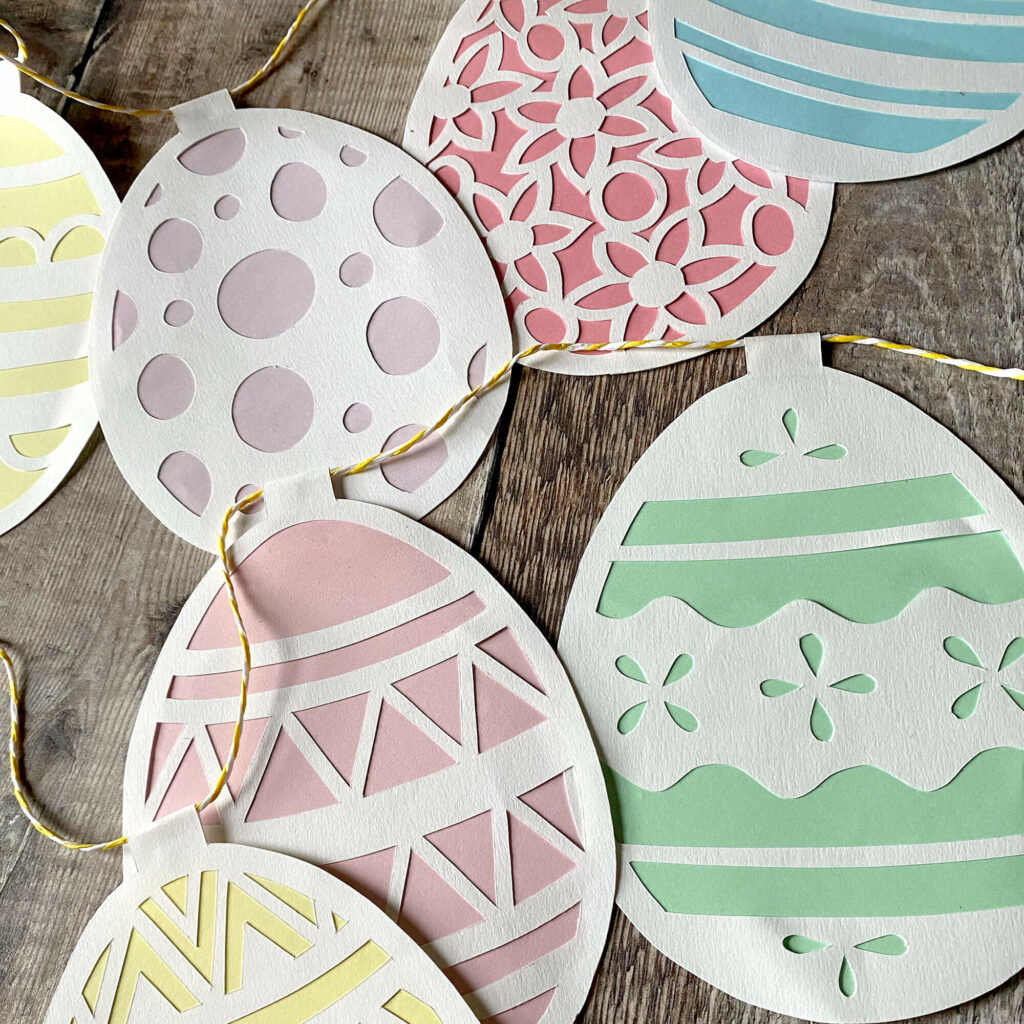
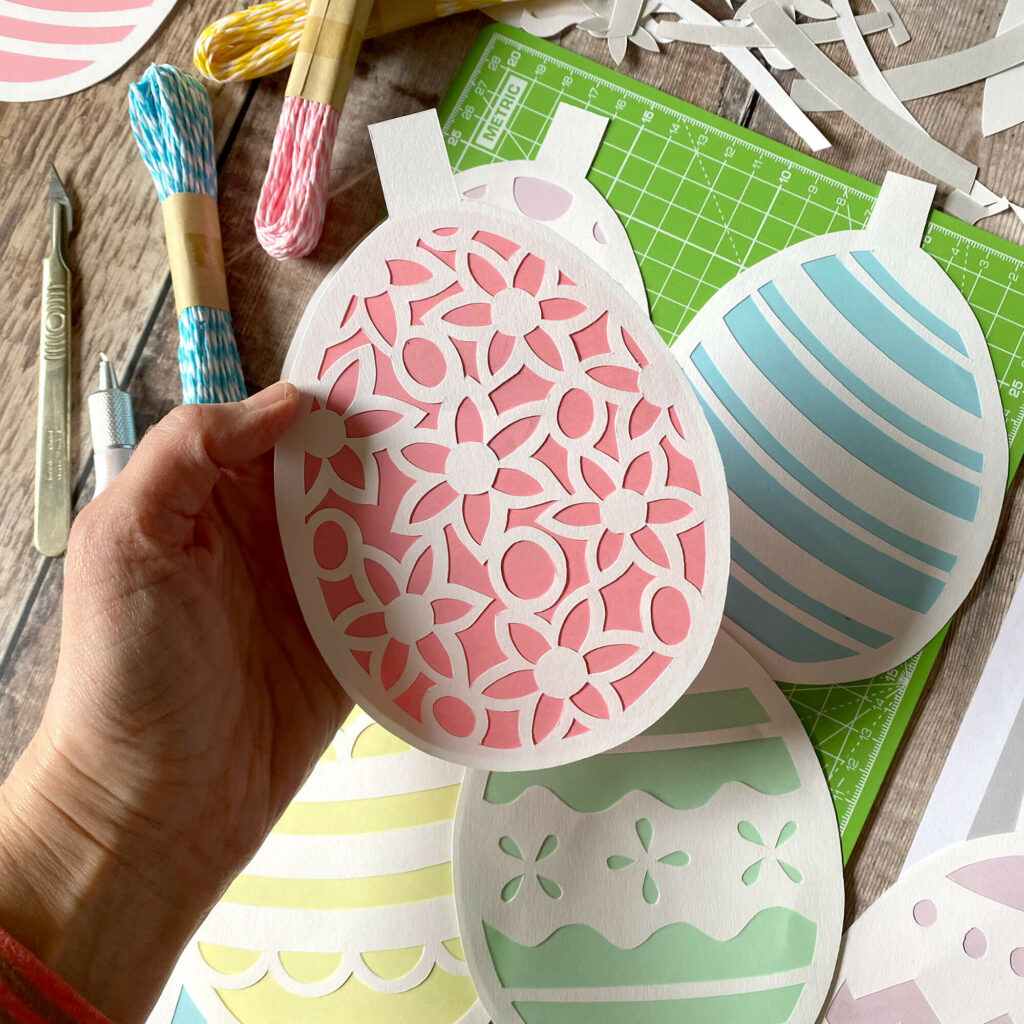
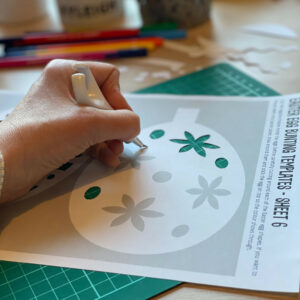
Grab Easter Egg Bunting sheet 1 and put the other sheets to one side. Put the sheet onto your cutting mat and holding the scalpel as you would a pen, begin to cut any of the inside grey shapes (the negative shapes). Always cut towards you in a controlled manner and aim to keep your cutting ‘within the lines’.
Once all the inside shapes on both Easter eggs are cut out, then cut around each of the shapes using your scalpel or a pair of scissors.
Be sure not to cut the top tab off the top of the egg as you need this to be able to hang the eggs on the twine later.
Step three
Continue to cut all the Easter Egg bunting templates out until all 12 are cut and looking mighty fine. Don’t rush – this is the beauty of papercutting, so enjoy and lose yourself in the quietly relaxing and satisfying journey. Ommmmm…
 Step four
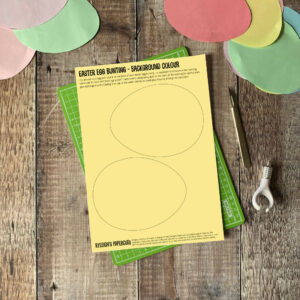
Once all eggs are done, print out the background template x6 times onto different colours of pastel paper. There’s x2 eggs on each sheet – I used pastel green, blue, purple, yellowand two slightly different shades of pink.
This is the shape that covers the back of the eggs. So an idea might be to print these sheets and have your children to cut around each one with scissors.
Or print them all onto white paper and have the kids paint or decorate each shape as you get on with your intricate egg templates. Something for everyone! You could also use patterned paper or glitter paper. Oooooh glitter!
 Step five
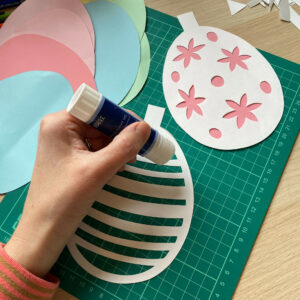
So your background shapes are cut and your intricate Easter egg bunting shapes are all cut yeah? Ok let’s get sticking! Grab your glue stick and carefully put some glue onto your cut-out white egg . We put glue on the white egg and not the background colour so that glue doesn’t show through the holes!
Alternatively you can use spray glue (I like to use SprayMount by 3M). Doing one egg at a time (and not spraying them all at once) spray it OUTSIDE, spray for about .5 of a second, you really don’t need much. And (popping back inside the house!) place the egg face down with the glue side facing UP – then take the coloured background shape and place down ontop of the glued egg. Flip over and smooth down. I really hope that makes sense!
 Step six
When all of your eggs have got their pretty coloured backs on then it’s time to grab your glue stick and twine, string or ribbon.Work out the order you want your eggs to hang in – and leave enough twine at the end to hang up.
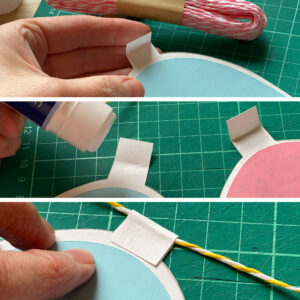
Then place each egg face down and find the tab at the top. Fold it in half so the top of the tab folds back in line with the top of the egg.
Unfold again and put a slither of glue stick or double sided tape onto the tab, place the bakers twine, string or ribbon on the crease of the fold and fold down on top of the glue. Hold in place until the glue sets a little.
Continue sticking all your eggs to the twine, remembering to leave a gap between each egg. I left about 120mm between each egg. When all the eggs are stuck down, remember to leave the same amount of twine to hang up as the length you left on the other end.
Step seven
Hang up and enjoy! I hung mine at the window and will be making more this Easter for the dresser and even the wall or up the stairs. You can go absolutely CRAZY with it. If you’re hanging it in a window then why not print and cut all the Easter Egg bunting templates again, cut them again, cut off the tabs and stick the right pattern to the back of each egg so they look great and finished from either side. BOOM!
Let me know how you get on – and if you’re on Instagram, pop over there and tag me because I LOVE to see your creations and always reshare them to my stories where I can if you’d allow.
I hope you loved making the Easter Egg Bunting, if you get the bug then don’t forget there’s simply loads of instant printable templates for you to get stuck into here, on my Etsy shop and I can even create custom papercut templates for you.
Happy cutting folks!

Like it? Gimme a pin